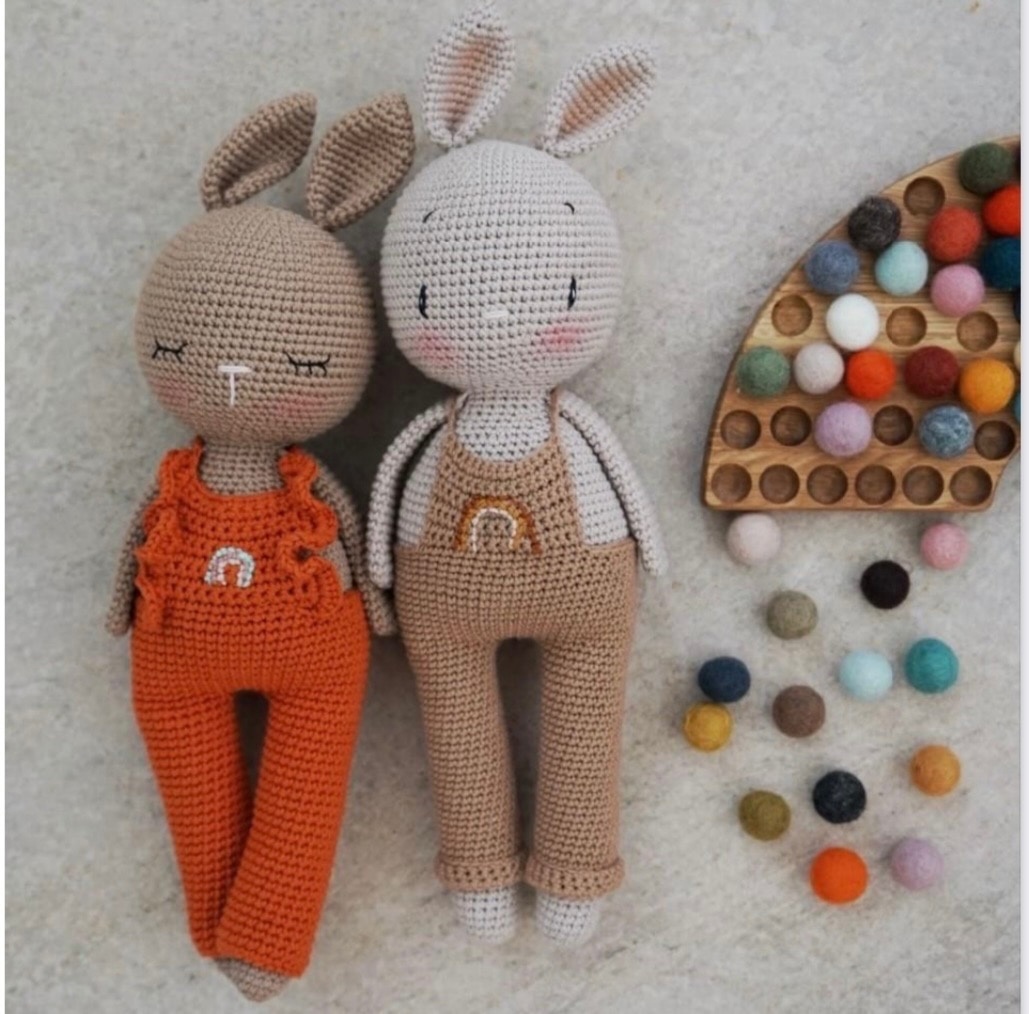
Crochet Cute Rainbow Rabbit Miro and Mira Amigurumi Free Pattern
Hello dear visitors, I am here again with new amigurumi molds for you. I am sharing amigurumi patterns for you here for free. You can make your children happy by making these patterns. Amigurumi toys are very popular lately and are the most beautiful toys that don’t harm your kids. Your kids will love them. Let’s move on to our pattern and give them this gift.
Materials.
• Yarn in different colors:
for the body: cotton in brown or beige
for the overall: cotton or merino in the
color of your choice
(exact materiallist see below)
• Crochet hook 2,5mm for the bunny
• Crochet hook 3mm for the overall
• black, pink and white embroidery thread for
the eyes and the nose
• Stuffing
• Yarn Needle for sewing and embroidering
eyes, nose and rainbow
• optional: yarn remains in 3 colors for the
embroidered rainbow
• optional: music box with the maximum size
of 5,5 cm x 4,8 cm (plus one ball or
wooden ring for the string to play)
Abbreviations:
sc single crochet
inc increase
dec decrease
sl st slip stitch
ch chain stitch
rnd round
r row
HS hook size
(…) …x repeat the instructions in the
brackets as indicated after the brackets
Bunny 1.
Organic cotton from Ecobebek (color Goat), 105m/50g,
HS 2,5mm. Used quantity approx. 100g (2 balls of yarn).
Alternative: any cotton minimum approx. 120m/50g
(e.g. Schachenmayr Catania)
Overall made with pure wool:
Merino yarn from KPC Yarn (color Caramel), 107m/50g,
HS 3mm (very loosely crocheted). Used quantity approx.
50g (1 ball of yarn).
Alternative: e.g. Merino yarn from Rico Design, Essentials
Merino DK
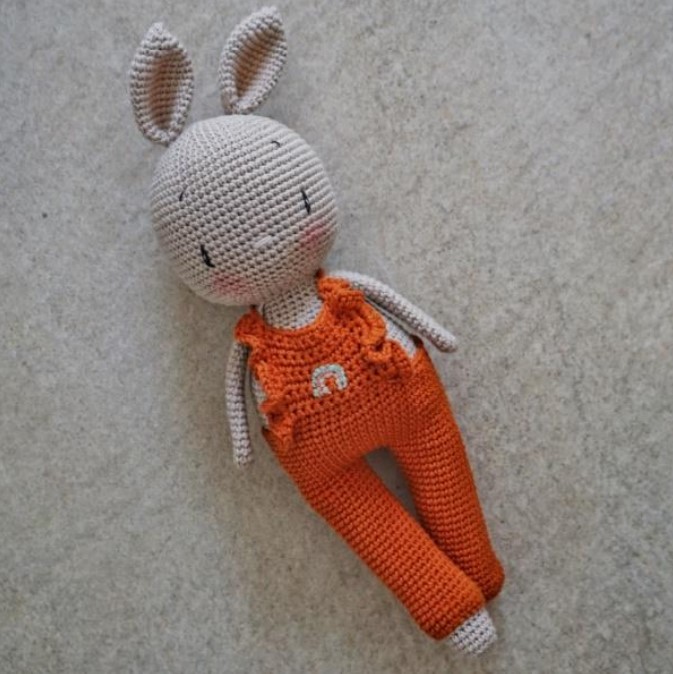
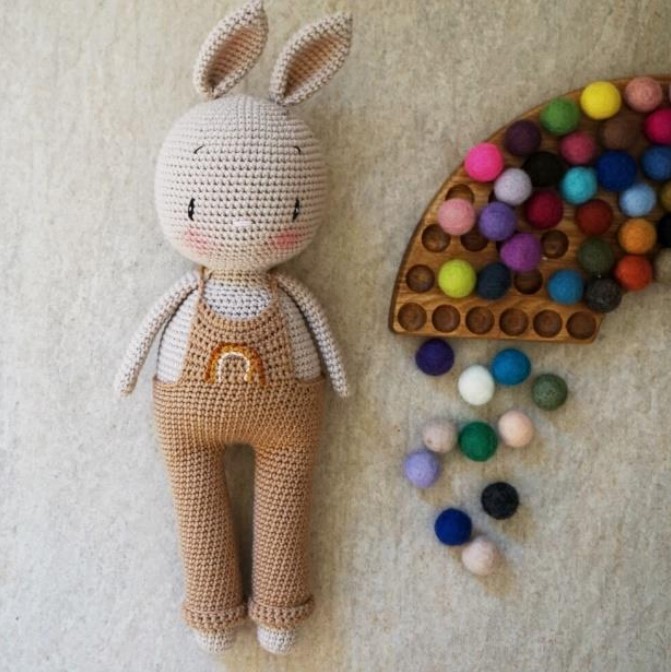
Bunny 2.
Organic cotton from Ecobebek (color Goat), 105m/50g,
HS 2,5mm. Used quantity approx. 100g (2 balls of yarn).
Alternative: any cotton minimum approx. 120m/50g
(e.g. Schachenmayr Catania)
Overall made with cotton:
Organic cotton from Babytoly (color Marigold), 105m/50g,
HS 3mm (regular crocheted). Used quantity approx. 50g (1
ball of yarn).
Alternative: e.g. Schachenmayr Catania
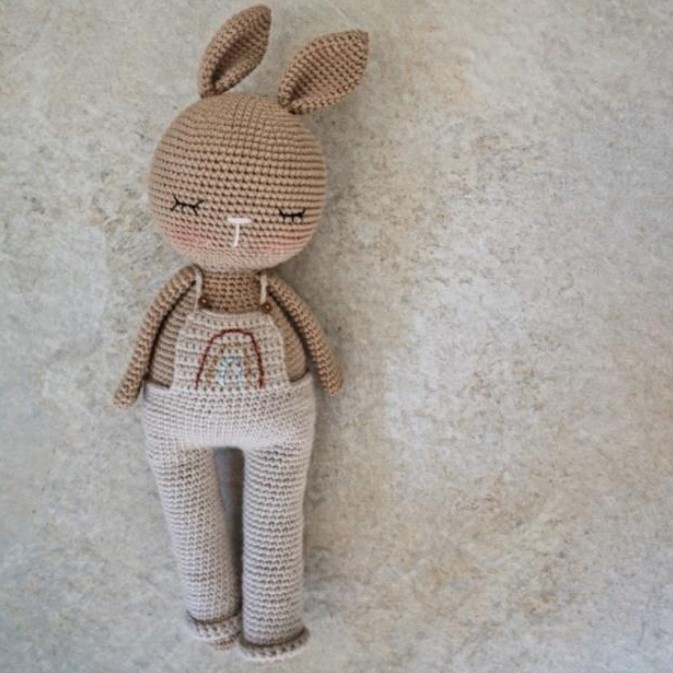
Bunny 3.
Organic cotton from Ecobebek (color Marple), 105m/50g,
HS 2,5mm. Used quantity approx. 100g (2 balls of yarn).
Alternative: any cotton minimum approx. 120m/50g
(e.g. Schachenmayr Catania)
Overall made with pure wool:
Merino yarn from KPC Yarn (color Wicker), 107m/50g,
HS 3mm (very loosely crocheted). Used quantity approx.
50g (1 ball of yarn).
Alternative: e.g. Merino yarn from Rico Design, Essentials
Merino DK
Head.
Worked in spiral rounds.
Rnd 1. 6 sc in a magic ring (6 sc)
Rnd 2. inc x6 (12 sc)
Rnd 3. (1 sc, inc) x6 (18 sc)
Rnd 4. (2 sc, inc) x6 (24 sc)
Rnd 5. (3 sc, inc) x6 (30 sc)
Rnd 6. (4 sc, inc) x6 (36 sc)
Rnd 7. (5 sc, inc) x6 (42 sc)
Rnd 8. (6 sc, inc) x6 (48 sc)
Rnd 9. (7 sc, inc) x6 (54 sc)
Rnd 10. (8 sc, inc) x6 (60 sc)
Rnd 11. (9 sc, inc) x6 (66 sc)
Rnd 12. (10 sc, inc) x6 (72 sc)
Rnd 13.-25. 72 sc (13 rounds)
Rnd 26. (10 sc, dec) x6 (66 sc)
Rnd 27. (9 sc, dec) x6 (60 sc)
Rnd 28. (8 sc, dec) x6 (54 sc)
Rnd 29. (7 sc, dec) x6 (48 sc)
Rnd 30. (6 sc, dec) x6 (42 sc)
Rnd 31. (5 sc, dec) x6 (36 sc)
Rnd 32. (4 sc, dec) x6 (30 sc)
Rnd 33. (3 sc, dec) x6 (24 sc)
End with 1 sl st and fasten off. Leave a long tail for
sewing the head onto the body. Stuff the head.
Legs (make 2) and Body.
First Leg.
Worked in spiral rounds. Don’t forget to stuff the legs with stuffing bit by bit. That way you‘ll avoid bumps. Fill as
firmly as possible.
Rnd 1. 6 sc in a magic ring (6 sc)
Rnd 2. inc x6 (12 sc)
Rnd 3. (1 sc, inc) x6 (18 sc)
Rnd 4.-35. 18 sc (32 rounds)
End with 1 sl st and fasten off. Sew the yarn end accurately.
Second Leg.
Crochet like the first leg but don’t fasten off. We will attach the first leg now.
Attaching the legs.
Rnd 36. Continue with 6 ch onto the second leg, take the first leg and attach it with 1 sc. Work 17 sc along the
leg, 6 sc into the chain, 18 sc along the second leg and 6 sc into the front loops of the chain. (48 sc)
Place your marker here. The new round begins now.
Rnd 37. (7 sc, inc) x6 (54 sc)
Rnd 38. (8 sc, inc) x6 (60 sc)
Rnd 39. (9 sc, inc) x6 (66 sc)
Rnd 40.-50. 66 sc (11 rounds)
Rnd 51. (9 sc, dec) x6 (60 sc)
Rnd 52. 60 sc
Don’t forget to stuff the body with stuffing bit by bit.
If you want to make Miro with a music box, you can put it into the half-finished body. Use a needle to bring out the
string from the music box between the legs. Put filling around the music box. You can fill the belly firmly. Don’t
place filling underneath the music box, so the stuffing can’t tangle the string and the music box can play without
disturbances.
Rnd 53. (8 sc, dec) x6 (54 sc)
Rnd 54. 54 sc
Rnd 55. (7 sc, dec) x6 (48 sc)
Rnd 56. 48 sc
Rnd 57. (6 sc, dec) x6 (42 sc)
Rnd 58. 42 sc
Rnd 59. (5 sc, dec) x6 (36 sc)
Rnd 60. 36 sc
Rnd 61. (4, sc, dec) x6 (30 sc)
Rnd 62. 30 sc
Rnd 63. (3 sc, dec) x6 (24 sc)
Rnd 64. 24 sc
Rnd 65. 12 sc plus 1 sl st (at the back). Fasten off and sew the yarn end accurately.
Arms (make 2).
Worked in spiral rounds.
Rnd 1. 7 sc in a magic ring
Rnd 2. inc x7 (14 sc)
Rnd 3.-22. 14 sc (20 rounds)
Don’t fill the arms.
Fold the opening of the arm and close it with 6 sc.
Fasten off and leave a long tail for sewing.
Ears (make 2).
Worked in spiral rounds
Rnd 1. 6 sc in a magic ing
Rnd 2. 6 sc
Rnd 3. inc x6 (12 sc)
Rnd 4. 12 sc
Rnd 5. (1 sc, inc) x6 (18 sc)
Rnd 6. (5 sc, inc) x3 (21 sc)
Rnd 7.-15. 21 sc (9 rounds)
Rnd 16. (5 sc, dec) x3 (18 sc)
Rnd 17. (1 sc, dec) x6 (12 sc)
End with 1 sl st and fasten off. Leave a long tail. Fold the ear in the middle and sew it together with 1 – 2 stitches.
Overall.
There are 3 ways to crochet the overall. The first one is worked with merino yarn, the second one is worked with
cotton (same weight as the bunny) and with the third one you can add flounces to the overall.
Version 1, Overall
Made with cotton from Babytoly, 105m/50g, HS 3mm:
The overall is worked in the same way as the legs and the connection to the body.
Pant Leg (2x)
Crochet a chain with 23 ch and close them to a circle with 1 sl st into the first ch.
Rnd 1. 1 ch (this is the first stitch of the next round), 22 sc into the other 22 ch
From here we work in spiral rounds.
Rnd 2. – 26. 23 sc (25 rounds)
End with 1 sl st and fasten off. Sew the yarn end accurately.
Crochet like the first pant leg but don’t fasten off. We will attach the first pant leg now.
Rnd 27. Continue with 4 ch onto the second pant leg, take the first pant leg and attach it with 1 sc. Work 22 sc
along the pant leg, 4 sc into the chain, 23 sc along the second leg and 4 sc into the front loops of the
chain. (54 sc)
Rnd 28.-37. 54 sc (10 rounds)
Rnd 38. (7 sc, dec) x6 (48 sc)
Rnd 39. + 35 sc so the work ends at right side of the back, end with 1 sl st and fasten off, sew the yarn end
accurately
The Bib
The bib is worked in rows.
Put the pants in front of you, you should count approx. 24 sc on the front. Count 7 sc from the right to the left.
Work the 1st sc into the 8th sc and then make another 11 sc.
R1.-R9. 12 sc, 1 ch, turn (9 rows)
Don’t fasten off. Put the overall onto the bunny, so you can figure out the length of the suspenders. Crochet
approx. 23 ch (the length depends on the yarn you use), put the suspenders over the arm and finish them
crossed on the back at the upper edge of the pants with 1 sl st. Crochet along the edge of the pants approx. 15 sc. Then crochet another 23 ch and cross them on the back over to the arm and finish them with 1 sl st into the
side of the bib. Fasten off and sew the yarn end accurately
Version 2, Overall
Made with merino yarn, 107m/50g, HS 3mm, loosely crocheted:
The overall is worked in the same way as the legs and the connection to the body.
Pant Leg (2x)
Crochet a chain with 23 ch and close them to a circle with 1 sl st into the first ch.
Rnd 1. 1 ch (this is the first stitch of the next round), 22 sc into the other 22 ch
From here we work in spiral rounds.
Rnd 2.-34. 23 sc (33 rounds)
End with 1 sl st and fasten off. Sew the yarn end accurately
Crochet like the first pant leg but don’t fasten off. We will attach the first pant leg now.
Rnd 35. Continue with 4 ch onto the second pant leg, take the first pant leg and attach it with 1 sc. Work 22 sc
along the pant leg, 4 sc into the chain, 23 sc along the second leg and 4 sc into the front loops of the
chain. (54 sc)
Rnd 36. (8 sc, inc) x6 (60 sc)
Rnd 37.-46. 60 sc (10 rounds)
Rnd 47. (8 sc, dec) x6 (54 sc)
Rnd 48. + 35 sc so the work ends at right side of the back, end with 1 sl st and fasten off, sew the yarn end
accurately
The Bib
The bib is worked in rows.
Put the pants in front of you, you should count approx. 27 sc on the front. Count 6 sc from the right to the left.
Work the 1st sc into the 7
th sc and then make another 14 sc.
R1.-R.10. 15 sc, 1 ch, turn (10 rows)
Don’t fasten off. Put the overall onto the bunny, so you can figure out the length of the suspenders. Crochet
approx. 26 ch (the length depends on the yarn you use), put the suspenders over the arm and finish them
crossed on the back at the upper edge of the pants with 1 sl st. Crochet along the edge of the pants approx. 15
sc. Then crochet another 26 ch and cross them on the back over to the arm and finish them with 1 sl st into the
side of the bib. Fasten off and sew the yarn end accurately.
Version 3, Overall with ruffles
Crochet the overall as shown in version 1 or 2. Work another row onto the bib, so that the overall rises up a little
higher. Work the suspenders as shown in the version 1 and 2. For the ruffles you have to crochet along the side
of the bib.
The amount of stitches doesn’t matter here. It’s important to increase the right amount of stitches in every row
though. Start the first row with a standing sc (start with the same beginning as you do for a chain, hold the loose
end of the yarn and crochet a normal sc in the first stitch) at the bottom right corner, as shown in the picture.
R1: increase every stitch -> approx. 12-14 inc (24-28 sc), 1 ch, turn,
R2: 24-28 inc (48-56 sc)
Fasten off and sew the yarn end accurately.
Repeat on the other side of the bib.
Finishing.
Sew the head onto the Body.
The sleeping eyes are embroidered between the 20th and 21st round and run over 5 stitches. Pins help you
sew the eyes symmetrically. Additionally I embroidered 3 lashes each. There are 9 stitches between both eyes.
For orientation the pictures on the next page will help you.
The open eyes are also embroidered using a thin black thread between the 21st and 24th row with a few
vertical stitches. Additionally you can add a small vertical stitch with white thread into the eye.
Place the little pink nose between the eyes and at the same level as the lower edge of the eye. Use a long pink
thread and embroider a horizontal line which runs over 3 – 4 stitches with a few stitches. Additionally you can
embroider a vertical line from the middle of the nose down about 4 rounds.
Sew the arms directly between the head and the body on each side. Sew the ears on the left and right side of
the head between the rounds 5 and 6.
You can add red cheeks with pink rouge (and a make-up brush) or wax crayons.
At the end you can embroider a rainbow onto the overall.
Use a pencil to draw the 3 rainbow stripes onto the overall.
After that you embroider the rainbow with the “backstitch” from the inside to the outside. You don’t have to work
super accurately. I think an irregular rainbow adds its charm. When you’re finished with embroidering you have to
sew the yarn ends at the back of the bib. After that you can put the overall onto the bunny.
You can also roll up the overall at the bottom of the legs. This looks super cute.