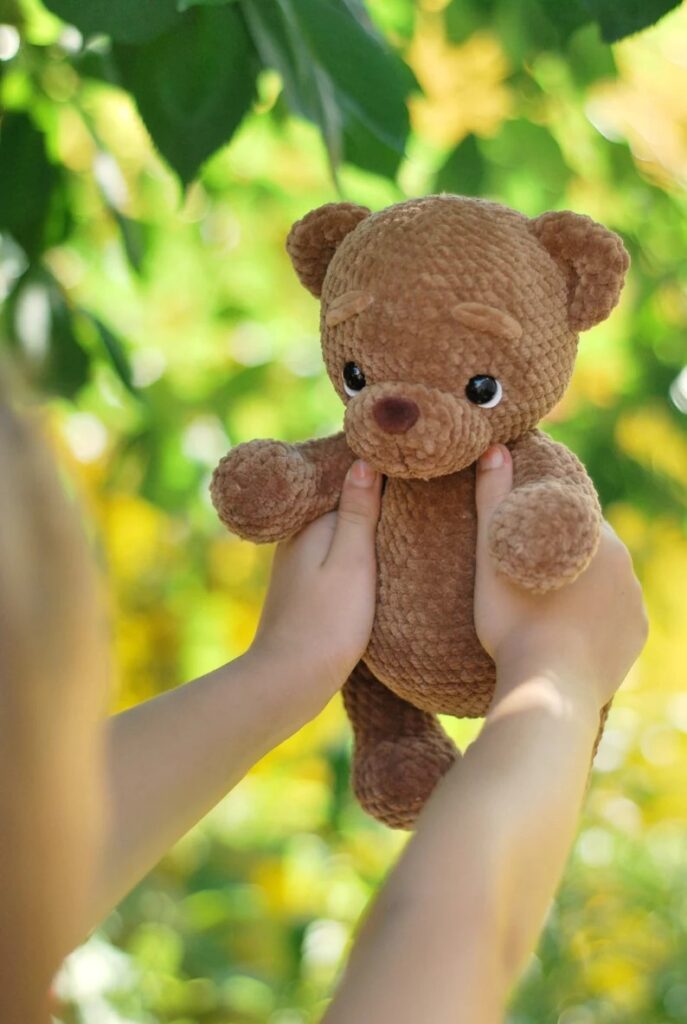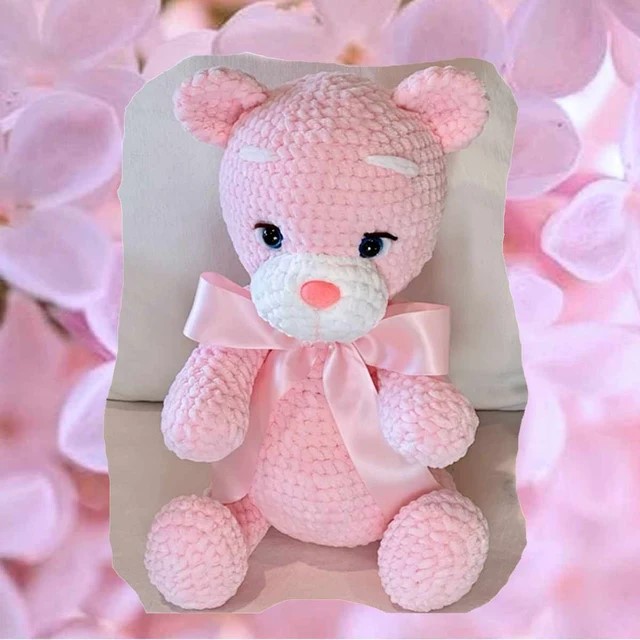
Crochet Cute Tedy Bear Amigurumi Free Pattern
Hello dear visitors, I am here again with new amigurumi molds for you. I am sharing amigurumi patterns for you here for free. You can make your children happy by making these patterns. Amigurumi toys are very popular lately and are the most beautiful toys that don’t harm your kids. Your kids will love them. Let’s move on to our pattern and give them this gift.
Materials
Yarn:
YarnArt DOLCE (100gr/120mt) – 762 brown (2 skeins)
You can use any velvet yarn with similar weight and any color
Sew-on eyes, d-10mm
Felt circles, d-12mm
18mm-15mm safety nose
Fiberfill – I use hollow fiber
Crochet hook – I used 3.0 (US D)
d-35mm disc and cotter pin
Strong thread for thread jointing
Long needle for thread jointing and scissors
Abbreviations:
MR – magic ring
SC – single crochet
SL ST – slip stitch
CH – chain
INC – increase; work 2 stitches into one stitch
DEC – decrease; work 2 stitches together
(…)*Х – repeat the instructions in parentheses Х times
(…) – a total amount of stitches in the round.
Shift stitches – crochet additional stitches in the round to keep
a marking thread even. In this pattern we use US terminology.
Arms:
Make 2 identical pieces. Stuff as you go.
Rnd 1. 6sc in MR
Rnd 2. 6inc (12)
Rnd 3. (1sc, 1inc)*6 (18)
Rnd 4-6. 18sc (3rounds)
Rnd 7. 2dec, 14sc (16)
Rnd 8. 2dec, 12sc (14)
Start to form our arms’ bending starting from this point. We are
going to alternate decreases and increases in every next round.
Rnd 9-15. 3sc, 1dec, 5sc, 1inc, 3sc (14) (7 rounds)
Rnd 16. 7sc, don’t work this round till the end
Rnd 17. 7dec (7)
Pull the opening closed, fasten off the thread and weave in the
thread tail.
Legs:
Make 2 identical pieces. Stuff as you go.
Rnd 1. ch5, from the second ch from the hook: 1inc, 2sc, 3sc into 1
ch, 3sc (10)
Rnd 2. 2inc, 2sc, 3inc, 2sc, 1inc (16)
Rnd 3. (1inc, 1sc) 2, 2sc, (1inc, 1sc)3, 2sc, 1inc, 1sc (22)
Rnd 4. (1inc, 2sc) 2, 2sc, (1inc, 2sc)3, 2sc, 1inc, 2sc (28)
Rnd 5-6. 28sc (2rounds) +3sc, keep the marker even, it should be
located right in the middle of the foot.
Rnd 7. 8sc, 6dec, 8sc (22)
Rnd 8. 5sc, 6dec, 5sc (16)
Rnd 9–18. 16sc (10 rounds) – stuff the piece till the end.
Rnd 19. 8dec (8)
Pull the opening closed, fasten off the thread and weave in the
thread tail.
Head:
Stuff the piece as you go. I stuff very firmly!
Rnd 1. 6sc in MR
Rnd 2. 6Inc (12)
Rnd 3. (1sc,inc)6 (18)
Rnd 4. (2sc,inc)6 (24)
Rnd 5. (3sc,inc)6 (30)
Rnd 6. (4sc,inc)6 (36)
Rnd 7. (5sc,inc)6 (42)
Rnd 8. (6sc,inc)6 (48)
Rnd 9. (7sc,inc)6 (54)
Rnd 10-17. 54sc (8rounds)
Rnd 18. (7sc,dec)6 (48)
Insert a disc with a cotter pin into the MR, stuff the head
Rnd 19. (6sc,dec)6 (42)
Rnd 20. (5sc,dec)6 (36)
Rnd 21. (4sc,dec)6 (30)
Rnd 22. (3sc,dec)6 (24)
Rnd 23. (2sc,dec)6 (18)
Rnd 24. (1sc,dec)6 (12)
Rnd 25. 6dec
Pull the opening closed, fasten off the thread and weave in
the thread tail.
Body:
Stuff the piece as you go; stuff firmly. Pay special
attention to the neck area and to the belly.
Rnd 1. 6sc in MR
Rnd 2. 6Inc (12)
Rnd 3. (1sc,inc)6 (18)
Rnd 4. (2sc,inc)6 (24)
Rnd 5. 24 sc into back loops only
Rnd 6. 24sc
Choose a cotter pin which fits the neck size.
It should be pushed closely to the neck.
Rnd 7. (3sc,inc)6 (30)
Rnd 8-9. 30sc
Rnd 10.(4sc,inc)6 (36)
Rnd 11. 36sc
At this stage we are going to attach the head to the body.
Insert the cotter pin ends from the head into the body and secure
them. If you don’t use a cotter pin, then just sew the head.
Rnd 12. (5sc,inc)6 (42)
Rnd 13. 42sc
Rnd 14. 18sc, (1inc, 1sc)3, 18sc (45)
Rnd 15. 45sc
Rnd 16. 18sc, (1inc, 3sc)2, 1inc, 18sc (48)
Rnd 17-20. 48sc (4 rounds)
Rnd 21. 18sc, (1dec, 3sc)2, 1dec, 18sc (45)
Rnd 22. 18sc, (1dec, 1sc)3, 18sc (42)
Rnd 23. (5sc,dec)6 (36)
Rnd 24. (4sc,dec)6 (30)
Rnd 25. (3sc,dec)6 (24)
Rnd 26. (2sc,dec)6 (18)
Rnd 27. (1sc,dec)6 (12)
Rnd 28. 6dec
Stuff the piece till the end. Fasten off the thread,
cut the tail and weave in.
Ears:
Make two identical pieces.
Rnd 1. 6sc in MR
Rnd 2. 6inc (12)
Rnd 3. (1sc, 1inc)*6 (18)
Rnd 4-5. 18sc (2 rounds)
Cut the thread.
Muzzle:
Rnd 1. ch4, from the second ch from the hook: 1inc, 1sc, 3sc into
the first ch, 2sc (8)
Rnd 2. 2inc, 1sc, 3inc, 1sc, 1inc (14)
Rnd 3. (1inc, 1sc)2, 1sc, (1inc, 1sc)3, 1sc, 1inc, 1sc (20)
Rnd 4. (1inc, 2sc)2, 1sc, (1inc, 2sc)3, 1sc, 1inc, 2sc (26)
Rnd 5. 26sc
Rnd 6. 16sc – don’t work this round till the end
Cut the thread. Step two rounds from the edge. Attach the
nose exactly in the middle.
Tail:
Rnd 1. 6sc in MR
Rnd 2. 6inc (12)
Rnd 3. (1sc, 1inc)6 (18)
Rnd 4-5. 18sc (2 rounds)
Rnd 6. (7sc, 1dec)2 (16)
Cut the thread.
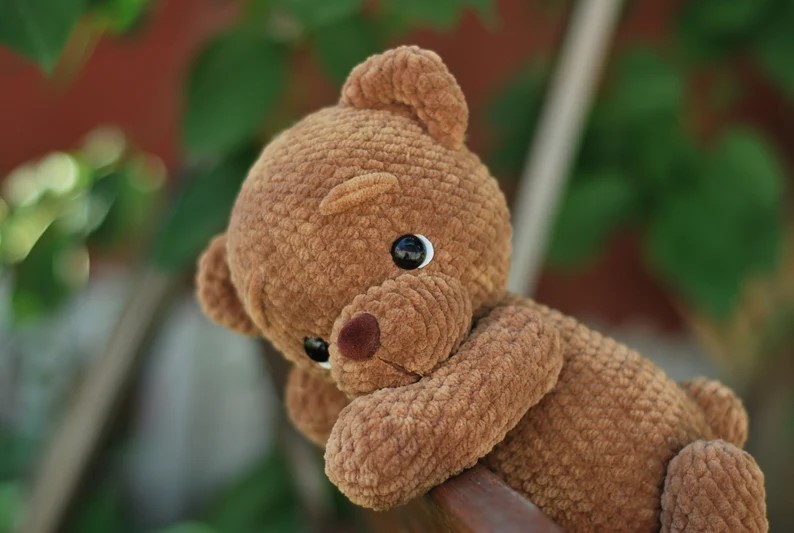
Assembly and details:
Fix the muzzle on the head with pins between the rounds 15
and 22. Step 5 rounds from the head center and fix the ears.
Make sure that all the pieces are located symmetrically. Sew the
fixed pieces. Sew the muzzle, having stuffed it beforehand. I
make a needle sculpting for the muzzle area additionally to make
the more snub-nosed shape. For this insert the needle into the
muzzle center into the lowest point 1 leaving a tail, pull it out from
the p2 near the left eye. Make a stitch across the top edge of the
muzzle and reinsert the needle into the p3 near the right eye, pull
out from the lowest point 1, where it was first inserted. Pull the
thread ends and tie a knot, weave in the thread tails.
Mark the points, where the eyes and the eyebrows will be
located. The eyes are located in the round 15; the distance
between them is 8 stitches.
Sew the eyes, pull them slightly inwards. For this insert the
needle into the head back, pull out from the point where the first
eye will be located, run through the eye and return to the same
point, where the needle was inserted. Pull the thread ends, making
the eye to be sunk into the head. Secure the thread ends. Repeat
the same steps with the second eye. Embroider the eyebrows.
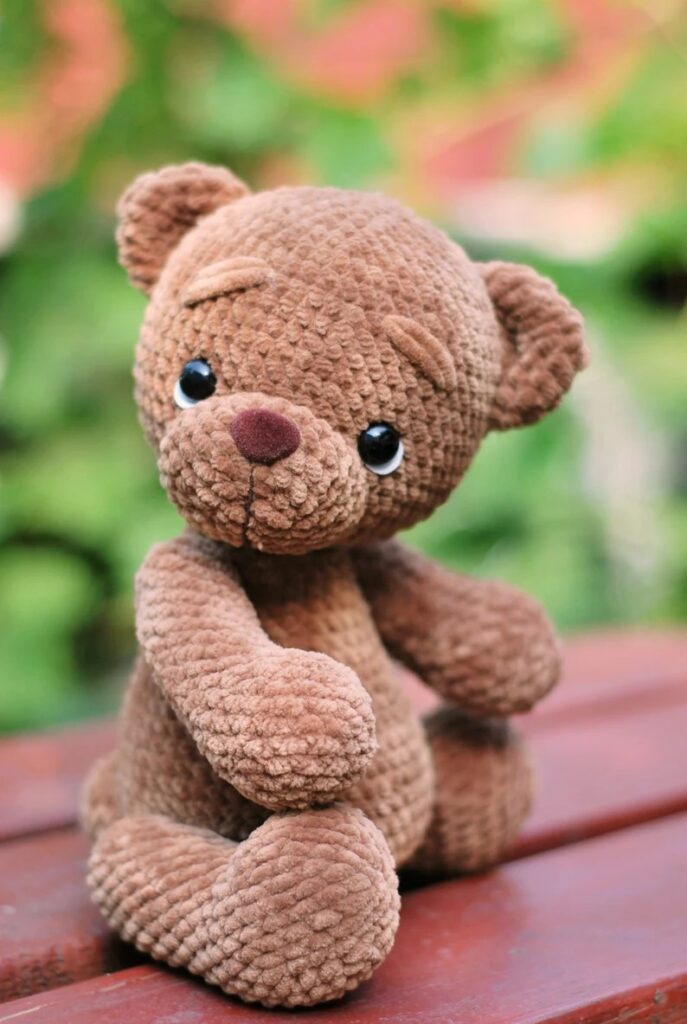
Thread jointing for the limbs:
Sew the limbs to the body using a thread jointing.
Mark the points between the rounds 7 and 8 where the arms
will be located with pins.
Fix the arms to the body sides at the level of rounds 7 and 8.
Check and make sure we are fully satisfied with their location.
Watch for the body proportions, the belly should be located exactly
at the front center. Attach the arms to the sides in the way that
the belly is not shifted.
Sew the arms: Insert the needle into the body and pull it out
from the opposite side. Leave a thread tail; we will use it then to
secure the jointing. Run the needle through the arm. Return to the
same point, where the thread goes from, run through the arm again,
pulling the needle out stepping one stitch.
Run the needle through the body again. The needle should be
inserted stepping one stitch from the point from where it went out
before, and return to the opposite side, where we have the thread
tail left. Now we have the thread tails on the same side, pull them
so the arm is pushed to the body. Run the needle through the
second arm, return to the same point where we went out before,
and pull out stepping one stitch. Pull the thread tails again to push
the arms closely to the body and make a pair of knots.
Repeat all the steps two more times. Make sure the threaded
needle goes through the same points on the body; it should enter
and exit from the same openings. Fasten off the thread securely;
weave in the tails inside of the body.
Attach the legs in the same way. Count 7 rounds from the
lower point and mark the points on the sides in the way that the
belly was facing forward.
Check if the legs are located in the right way: the toy should
sit straight and shouldn’t lean over. Sew the legs.
Sew the tail, having stuffed it slightly. The tail mustn’t
interfere with the bear sitting.
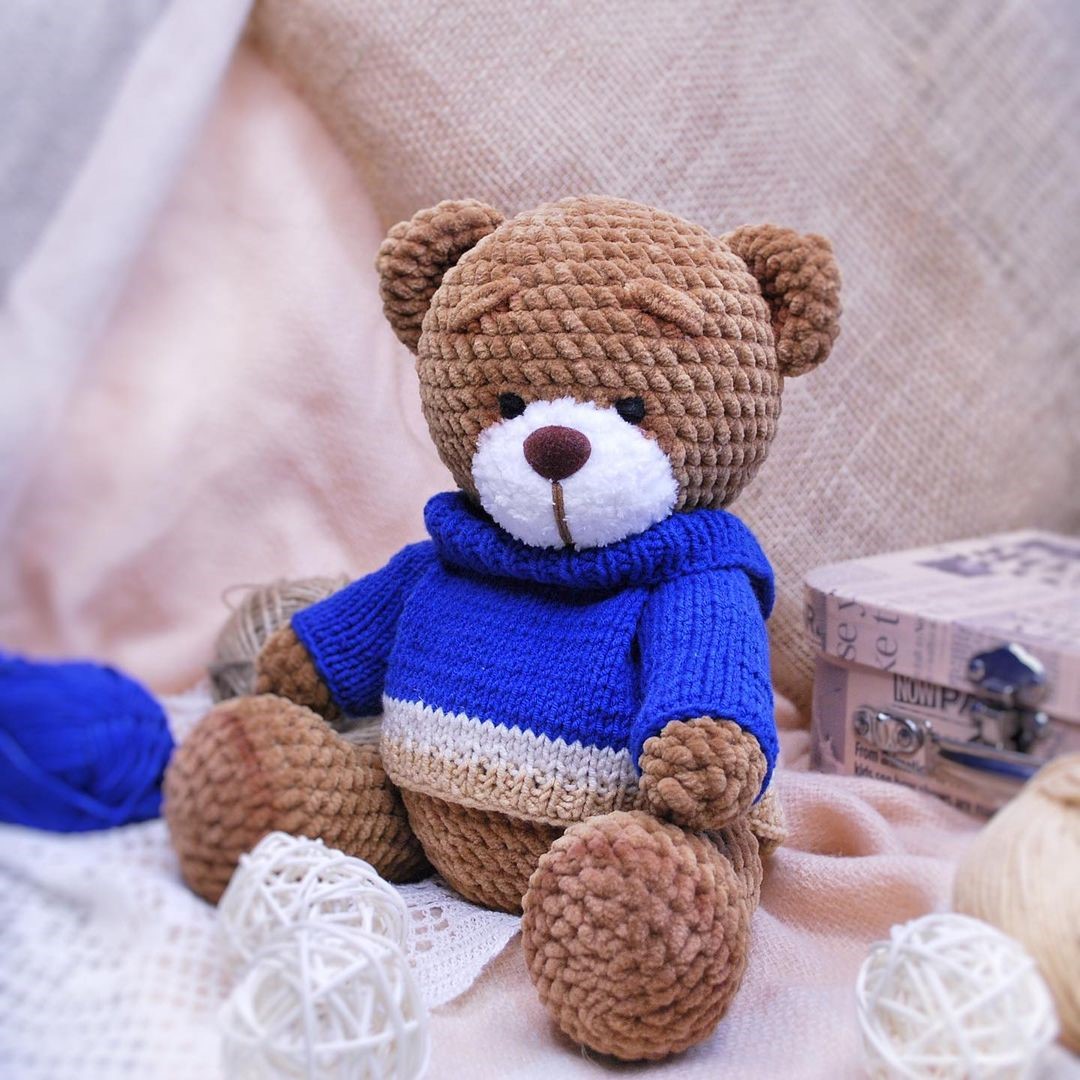
More Amigurumi Bear İdeas