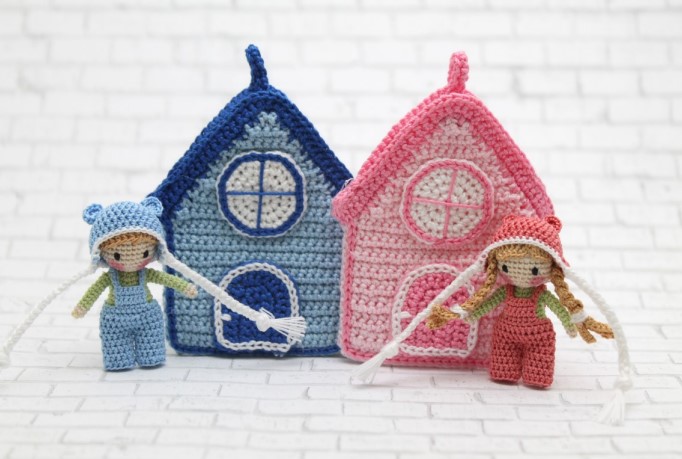
Tiny People Crochet Amigurumi Free Pattern
Hello dear visitors, I am here again with new amigurumi molds for you. I am sharing amigurumi patterns for you here for free. You can make your children happy by making these patterns. Amigurumi toys are very popular lately and are the most beautiful toys that don’t harm your kids. Your kids will love them. Let’s move on to our pattern and give them this gift.
MATERIALS:
Crochet thread, Lizbeth 40:
a. Ecru
b. Orchid green med
c. Sky blue Lt
d. Maple butter
e. Coral pink
f. White
DMC cotton perle thread, size 12 – black
Crochet hook, Clover Amour (0.9 mm)
Polyfil
Cotton swab and blush
ABREVIATIONS:
ch(s) – chain(s)
sc – single crochet
hdc – half double crochet
dc – double crochet
st(s) – stitch(es)
esc – extended single crochet
fsc – foundation single crochet
trbl – treble crochet
RS – right side
YO – yarn over
NOTES:
Crochet in continuous rounds.
Do not join rounds with a slip stitch unless otherwise specified.
The back side of the doll is where the round ends and the new round begins.
Head and Body
Start with color ecru.
Round 1 (RS): mr, ch 1 (it does not count as a st), 8 sc in the ring – 8 sts
Round 2: 8 inc – 16 sts
Round 3: (1 sc, inc ) x8 – 24 sts
Round 4: sc around – 24 sts
Round 5: (2 sc, inc) x8 – 32 sts
Rounds 6 – 10: sc around – 32 sts
Round 11: (2 sc, dec) x8 – 24 sts
Round 12: sc around – 24 sts
Round 13: (1 sc, dec) x8 – 16 sts
Stuff the head firmly before finishing round 14.
Round 14: 8 dec – 8 sts
Round 15: sc around – 8 sts
Change color: green
Round 16: 8 inc – 16 sts
Round 17: (1 sc, inc) x8 – 24 sts
Round 18: (2 sc, inc) x8 – 32 sts
In the next round we will start shaping the body.
Round 19: 5 sc, sk 6 sts (armhole created), 10 sc, sk 6 sts (2
nd armhole created), 5 sc – 20 sts
Round 20: 20 sc
Round 21: (3 sc, inc) x5 – 25 sts
Rounds 22 – 24: sc around – 25 sts
Change color: ecru
Round 25: (3 sc, dec) x5 – 20 sts
Round 26: sc around – 20 sts
Round 27: 3 sc
Stuff the body firmly and then hold the front and back of the body together. Leave 7 sts on
each side for legs. Make sure they align with the holes for the arms. Mark the middle 6 sts
(3 in front and 3 in the back) with thread.
Legs x 2:
Legs are not stuffed. Crochet tightly.
Continue with leg 1 from where you stopped with the body.
Rounds 1 – 8: sc around – 7 sts
Fasten off.
Leg 2 is made the same way. Attach ecru thread in one of the 7 sts you left earlier for the
second leg. YO, pull, and ch 1. Make 1 sc in the st you just chained 1. Continue sc around
for 8 rounds. Fasten off after round 8.
When you finish both legs, sew the 6 stitches between the legs. Finish off and secure the
stitches
Arms x 2:
Start with green thread. Start each arm in the back of the doll in the 6 stitches you left
earlier on either side of the body. You will crochet in continuous rounds without joining.
Keep the stitches tight because the arms are not stuffed. Crochet with green thread for 8
rounds and change to ecru for rounds 9 and 10
Face
Using the black thread, sew the eyes on Round 9, 6 stitches apart. Sew twice with double
thread. Make sure the thread does not twist.
Use cotton swab and blush to make the cheeks pink.
Hair
Boy Hair:
With Lizbeth 40, maple butter thread, make a magic ring.
Round 1 (RS): ch 1 (it does not count as a st), 8 sc in the ring – 8 sts
Round 2: 8 inc – 16 sts
Round 3: (1 sc, inc ) x8 – 24 sts
Round 4: (2 sc, inc) x8 – 32 sts
Rounds 5 – 9: sc around – 32 sts
Round 10: hdc in next 16, skip 1, sl st in next, skip 1, hdc in next 12, sl st in last
Fasten off.
Insert three pieces of maple butter thread into the mr of the head of the boy the same way
you would make tassels (see pictures below). Pull the pieces of thread through the mr hole
of the boy’s hair. Place the hair on the head and adjust so the spot where you made a slip
stitch is about 3 rounds above the eyes and is more above the right eye (when doll is facing
you).
trbl, sl st in next, ch 3 and 1 trbl in same st you made the sl st, 1 trbl in 2 sts, ch 3 and sl st
in same st you made last trbl
BRAIDS: continue from where you stopped with the bangs. 1 sl st in 2 sts, ch 25, 1 sc in 2nd ch from hook, 1 sc in 23 chs repeat 2 more times; 1 sl st in next 11 sts, repeat from ** 3
times and sl st in last st of round.
Fasten off and weave in the ends.
With the tail left from making the hair sew twice above the right eye at an angle to the left
and then again sew twice at an angle to the right.
Glue the hair to the head of the boy. Add a little glue so there are no bumps. Cut the thread
coming out of the magic ring to the desired length.
Girl Hair:
Follow instructions for boy hair until round 9.
In round 10, we will shape the bangs and make the strands to braid the hair later.
BANGS: ch 3, make 1 trbl in last sc of rnd 9, 1 trbl in 4 sts, ch 3 and sl st in same st as last
trbl, sl st in next, ch 3 and 1 trbl in same st you made the sl st, 1 trbl in 2 sts, ch 3 and sl st
in same st you made last trbl.
BRAIDS: continue from where you stopped with the bangs. 1 sl st in 2 sts, ch 25, 1 sc in 2nd ch from hook, 1 sc in 23 chs repeat 2 more times; 1 sl st in next 11 sts, repeat from ** 3
times and sl st in last st of round.
Fasten off and weave in the ends.
Glue the hair to the head making sure the bangs are in front, about a round or two above
the eyes.
Braid the three strands on each side tight and tie them with a piece of white thread. Make a
knot and secure it by gluing the ends.
Outfit
Waste of Overalls:
Start with sky blue for the boy and coral pink for the girl.
Ch 26 and join to the other side of chain with a sl st. Ch 1
Round 1: 1 sc in 1st ch from hook, 1 sc in 25 sts; sl st to join and ch 2 – 26 sts
Rounds 2 – 4: 1 hdc in 26 sts; sl st to join and ch 2 – 26 sts
Pants Leg 1:
Continue without breaking the thread.
Round 1: 1 hdc in 10 sts; YO once and insert hook in the same st you just made the 10th hdc
and then insert through the stitch on the other side skipping 13 sts (see picture below);
make 1 hdc, 1 hdc in the last two sts; sl st to join and ch 2 – 13 sts
Rounds 2 – 5: 1 hdc in each st; sl st to join and ch 2 – 13 sts
Fasten off and weave in the ends.
Pants Leg 2:
Start in any one st from the back of the overalls. Insert the hook, YO, and pull. Ch 2 and
make 1 hdc in same stitch.
Round 1: 1 hdc in next 12 sts; sl st to join and ch 2 – 13 sts
Rounds 2 – 5: 1 hdc in each st; sl st to join and ch 2 – 13 sts
Fasten off and weave in the ends.
Top of overalls:
The top is made in the 6 middle stitches in the front of the overalls.
1 sc in each of the 6 sts for 4 rows. Chain 1 and turn after each row.
Fasten off and weave in the ends.
Straps x 2:
11 fsc
Sew them to each end of the top of the overalls and then the back and weave in the ends.
Hat:
With sky blue for the boy and coral pink for the girl make a magic ring and ch 2.
Round 1: make 8 hdc in the ring; sl st to join and ch 2 – 8 sts
Round 2: 8 inc; sl st to join and ch 2 – 16 sts
Round 3: (hdc, inc) x 8; sl st to join and ch 2 – 24 sts
Round 4: (2 hdc, inc) x 8; sl st to join and ch 2 – 32 sts
Rounds 5 – 8: 1 hdc in 32 sts; sl st to join and ch 2 – 32 sts
Fasten off and weave in the ends.
Flaps of the hat x 2:
With sky blue for the boy or coral pink for the girl start 6 sts from the join. Insert hook in
st, YO and pull, ch 2.
Row 1: 1 hdc in same st you ch 2; 1 hdc in 4 sts; ch 2 and turn – 5 sts
Row 2: 1 hdc dec, 1 hdc, 1 hdc dec – 3 sts
Fasten off and weave in ends.
The second flap is made the same way. There will be 11 empty stitches between the flaps in
the front and back of the hat.
Bear ears x 2:
With sky blue for the boy and coral pink for the girl make a magic ring and ch 3.
Round 1: 8 dc in the ring; sl st to join
Leave a tail for sewing and fasten off.
With white, 1 sc in each st of the hat including around the flaps. Fasten off and weave in the
ends.
Cut 18 long pieces of white thread. Insert three pieces at a time in each of the 3 sts of last
round of the flaps (round in white). Both ends should meet. Braid to desired length. Tie a
knot and cut excess thread.
More Amigurumi Doll İdeas